
 MONA OS 2.0
 Hợp tác với MONA


 Tự động hoá doanh nghiệp
 Cẩm nang SEO
 Digital Marketing
 Kinh nghiệm thiết kế website
 Hạ Tầng Server
 Giáo dục


 VI
 EN
















Message us on
Zalo Official


 ProductsNew

 ProductsProducts
 Mới ra mắtKHA AI 2027App tự edit video, tự đăng mọi mạng xã hội, 2 phút mỗi ngày










 Thiết kế websiteVừa đẹp vừa thuyết phục được khách.
Dịch vụ SEOKéo về khách đang tìm đúng thứ anh chị bán.
 Tư vấn digital marketingKéo khách từ nhiều kênh, đo bằng số thật.
Quay video doanh nghiệpVideo giới thiệu công ty, nhà xưởng, đội ngũ.
 MớiDựng video AIDựng phim câu chuyện công ty bằng AI.
 Custom software developmentCRM, ERP and HRM built for your business.
 Viết AI Agent theo yêu cầuĐặt riêng một trợ lý AI cho đúng việc của mình.
 Tư vấn chuyển đổi AIĐưa AI vào vận hành của cả công ty.
NewMONA LMSManagement for centers and schools.
MONA SkillHubInternal training for company staff.
 NHTQ systemEnd-to-end China–Vietnam shipping operations.
MONA JMSManagement for gold, diamond and pawn shops.
 MONA E-LearningA website with every feature you need to sell courses.
 How to sell online courses (course)More than 30 free lessons on selling courses on autopilot.
 MONA Cloudmonacloud.vnServers to get your apps and websites running.
 MONA Basemonabase.vnPostgres database, sign-in and file storage.
 MONA Mailmonamail.vnSend OTP, order and invoice emails from your software.
 MONA Paymonapay.vnAccept bank transfers via VietQR and notify your software when the money arrives.
 MONA eInvoiceComing soonIssue e-invoices that meet tax standards.
Gấu CườiTrả lời khách 24/7 trên web, Fanpage, Zalo và thu lead cho sale.
 Gấu TeleSalesGọi điện tư vấn, chăm khách như tổng đài viên thật.
Dê CườiTư vấn và chốt đơn cho shop ngay trong khung chat.
Gấu WebmasterNhắn nhóm Zalo là website được sửa xong.
 Gấu Pháp ChếSoạn hợp đồng, rà điều khoản trong vài phút.
 Gấu Báo GiáLên báo giá đúng mẫu và gửi khách ngay.
 AI chăm sóc khách hàngTheo dõi và giữ chân khách hàng cũ.
 Gấu Tuyển DụngLọc hồ sơ, hẹn lịch, phỏng vấn ứng viên.
 Mới ra mắt
KHA AI 2027
Xây kênh chuyên gia 2 phút mỗi ngày
Quay bằng điện thoại, AI tự edit video, tự đăng lên 16 nền tảng và tự trả lời bình luận, tin nhắn.
872.542lượt xem trên kênh CEO MONA sau 35 ngày
 Anh Khánh HùngCEO MONA đang dùng mỗi ngày
Xem app làm được gì
 AI
Gấu Cười MONA ĐANG TỰ XÀITrả lời khách 24/7 trên website, Zalo OA, Messenger và thu lead về cho sale.
Dê CườiChốt đơn bán lẻ và sàn: Shopee, TikTok Shop, web. Chăm cả khách sỉ, đại lý.
Gấu WebmasterCập nhật nội dung, tối ưu SEO website mỗi ngày.
Gấu TeleSalesGọi điện tư vấn, chăm khách như tổng đài viên thật.
Gấu Tuyển DụngLọc hồ sơ, hẹn lịch, phỏng vấn ứng viên tự động.
AI chăm sóc khách hàngGiữ khách cũ, cứu lead đã rớt cho phòng kinh doanh.
Gấu Pháp ChếSoạn hợp đồng, rà điều khoản trong vài phút.
Gấu Báo GiáLên báo giá đúng mẫu, gửi khách ngay khi có yêu cầu.
 Chuyển đổi AI toàn phầnGiải pháp tổng cho doanh nghiệp, 3 lớp triển khai.
 Viết AI Agent theo yêu cầuĐặt riêng một con AI gánh đúng nghiệp vụ của bạn.
 Custom softwareCRM, ERP and HRM with built-in AI automation.
 SEO & AEO thời đại AIĐược Google lẫn AI trích dẫn, không chỉ xếp hạng.
 Kiến thức AI cho doanh nghiệpBài phân tích, hướng dẫn ứng dụng AI vào vận hành.
 Free AI courses
 AI tools at work
App mới · KHA AI 2027
Xây kênh 2 phút mỗi ngày
AI tự edit video, tự đăng mọi mạng xã hội
Free consultation, 8am–10pm every day

18 March, 2023

After more than 14,000 projects, we have seen every CEO wince when ad money pours in but visitors click through and leave the page right away. Watching the bounce rate climb every day is painful. Customers have little patience. The cause mostly lies in page load speed, and the hidden culprit is oversized images that push the total page weight to 50 MB every time it opens. Reducing image size is no longer a technical trick; it is a required step to keep buyers in your online store.
Lighter images help the browser load smoothly, raise your Google scores, and in turn lift organic search rankings. They also save a meaningful amount on server bandwidth each month, sometimes tens of millions of VND. Reducing image size online solves this quickly without installing complex software like Photoshop. We take on website maintenance for clients every week, so we know this well. Below are the practical lessons we have gathered so you can do it yourself right away.
Looking at a sea of red in the speed report, the owner of a furniture workshop in District 12 sighed, unable to understand why his newly rebuilt website was still so slow. A customer clicks on a 50,000,000 VND table and chair set and has to wait ten seconds with the loading spinner turning; they will certainly think the company is unprofessional. When we opened the source code, the cause was obvious. It was all in the images.
This is something we see in almost every project we take over for maintenance. Content staff usually take photos straight from a smartphone, about 5 MB each, and put them directly into the post. A post with ten such images pushes the total page load to nearly 50 MB. Customers lose interest in shopping at once. A 4G mobile connection can never carry that much data, and visitors leave without a word.
Have you ever looked at the LCP metric in the article on Core Web Vitals hay Google PageSpeed Insights ? LCP measures the time it takes to display the largest element on the screen, which is usually the post's featured image. This technical flaw costs a lot of money. According to the official web.dev documentation, a page passes only when LCP is 2.5 seconds or less. Beyond that mark, the page's ranking gets pushed down, and the first of ways to speed up a website is always compressing images.
To rescue page load speed, there is no way around optimizing the whole media library and writing alt tags properly. Do this part and your website will run smoothly right away. Customers never wait.

When we tell clients to recompress images, many worry that product photos will get blurry and customers will not see the details. Rest assured, today's optimization technology is smart. Reducing file size does not mean losing sharpness if the right DCT compression filter is used. Three main factors decide how heavy an image file is. It is easy to do. Understand these three and you can handle any tool out there.
The first axis is dimensions, width and height, meaning the number of pixels. A photo from a digital camera is often 4000 px wide, while the display area in a post is only about 800 px. The excess uses many megabytes of storage that viewers cannot see at all. The first job is to crop and scale the image down to the size it is actually displayed at.
The second axis is the compression level, using 24-bit color JPG. Modern compression algorithms analyze areas of similar color in the picture and merge them to remove redundant data. This needs care. Push the quality slider too far and the image starts to show small blocky artifacts, which looks bad. A good compression level is usually around 80% of the original quality, which saves a lot of space.
The last axis is the file format. It is the easiest thing to change and the one most often forgotten. Newer formats like WebP perform far better than the old standards. Combine all three factors to produce an image that is feather-light yet stays clear.
To make this easy, we have put together a separate set of standards for each type of display. Once you know the standards, you can optimize your whole library with confidence.
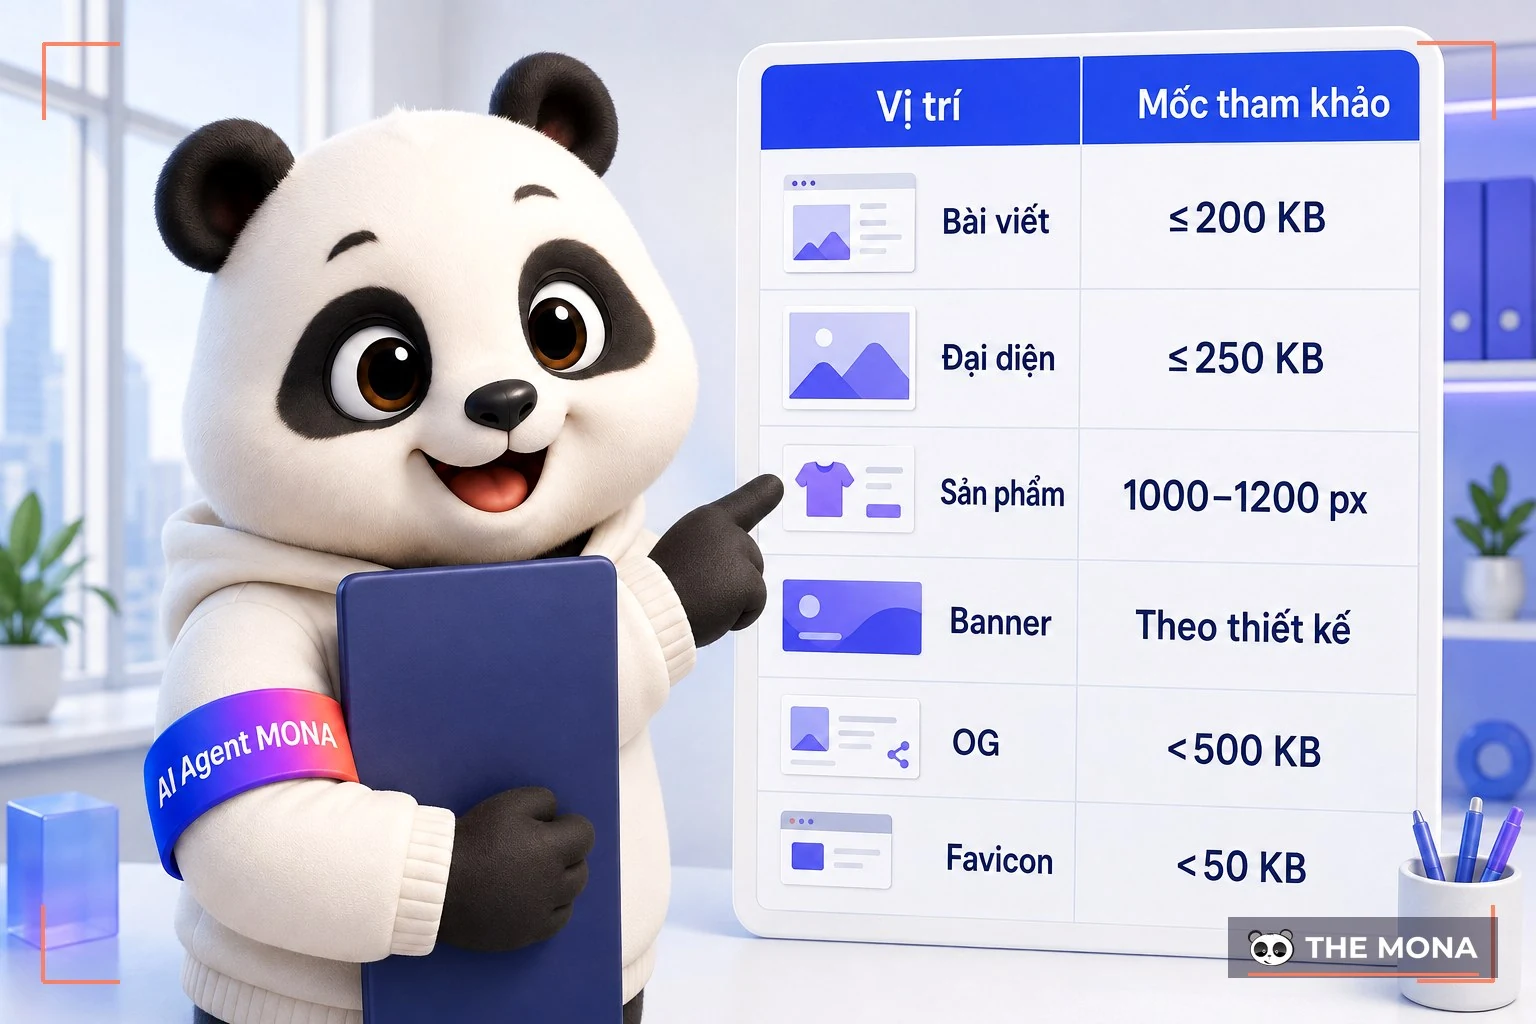
The other day, the manager of a fashion store messaged us asking why the shirt photo she posted looked sharp yet the website still reported a speed error. When we checked, the featured image was a light 50 KB, but a tiny logo, the size of a fingertip in the top left corner, weighed 2 MB. Everything on the layout immediately fell apart. Not setting a size limit for each display spot on an e-commerce website is a classic mistake that wastes web hosting server resources. Every spot has its own standard.
This is the set of limits we apply to every site we take over for maintenance. For ordinary images inserted in the middle of a post, the maximum is 200 KB each. Do not go over this, since a long post can contain dozens of illustrations. The featured image of a post, the rectangle at the top of the page, can go up to 250 KB. These numbers let the browser load smoothly even on a weak 3G connection.
For product detail photos, we always advise clients to crop square with the long side between 1000 and 1200 pixels. At this standard, customers can zoom in to see every stitch while the page still loads lightning fast. The favicon website must be compressed to under 50 KB, at about 512 square pixels. This step must not be done wrong.
Another very important part is images shared on social platforms. Read more about the standard for Open Graph to set the right size of 1200 by 630 pixels, with a file size under 500 KB being ideal. Remember this standard. Follow this mark and your website's speed will improve remarkably, and you will never worry about slowness again.
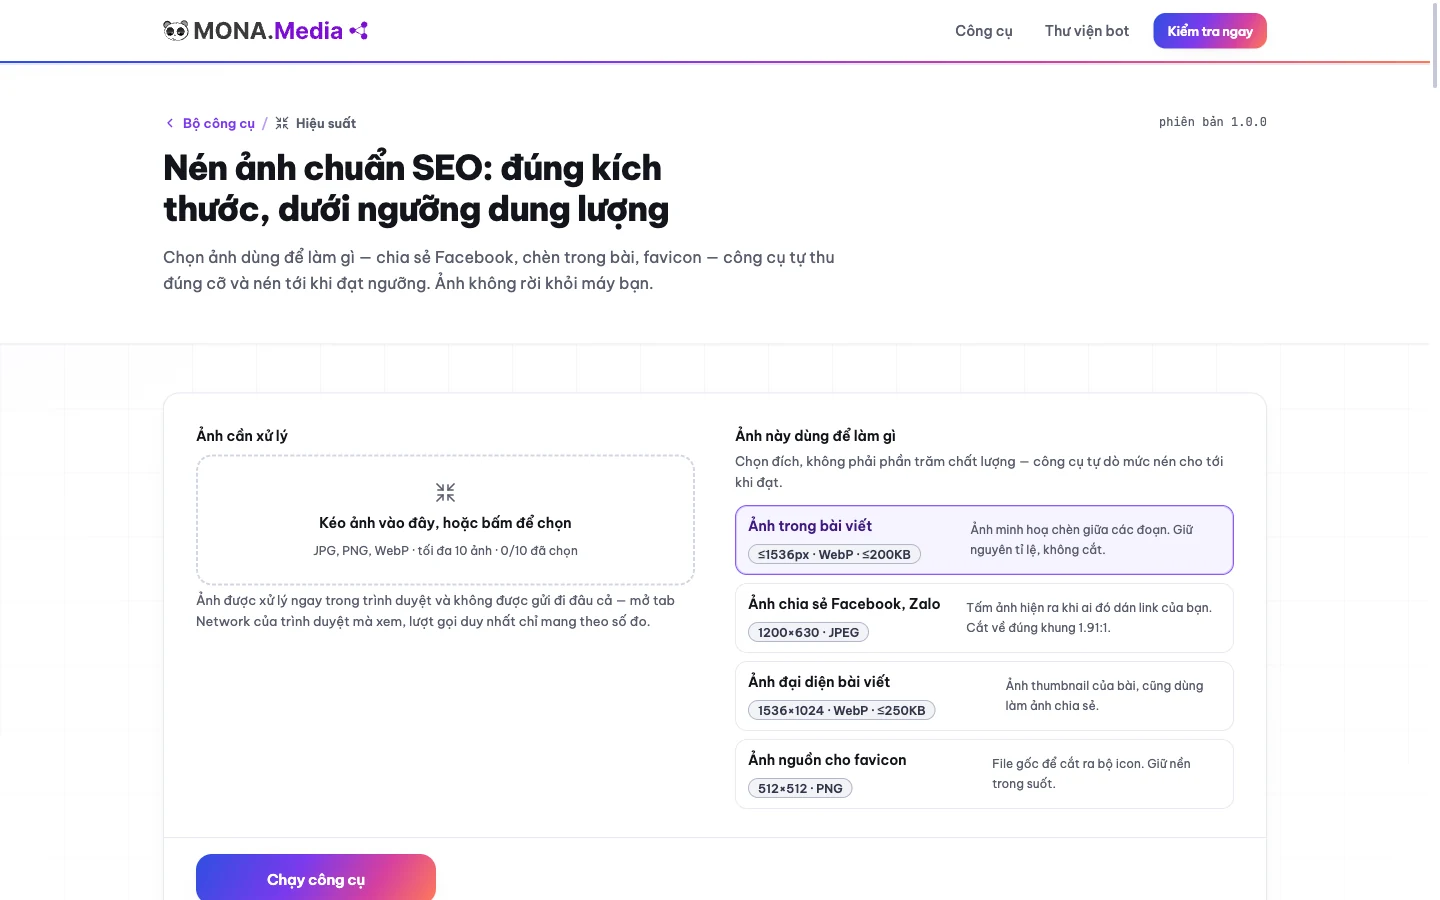
When using online tools, your biggest fear is leaking internal data. A real estate client once asked us directly: if an unreleased project drawing is compressed on an unknown website, where does that file go? That is a fair question. To settle this worry for good, we built our own SEO tools that optimizes images and runs entirely on the user's computer. Images are shrunk right in the browser and never uploaded to any third-party server, so your information stays fully private.
To get started, go to the image size reduction tool. On the main screen, choose what the image is for; the system shows three clear options: insert in a post, share on Facebook, or use as a site icon. Do not wait any longer. The engine underneath calculates automatically, resizes the image, then searches for the deepest compression until the file size reaches the 200 KB standard we set.
Here is the step-by-step path. First, open the tool page and click the upload button. Next, choose the purpose. Wait about two seconds and you will see the result, showing the real measurements including the new dimensions and the file size before and after compression. The process is smooth and light. Finally, click download to get the optimized file.
No account sign-up, no ads. Do it once and use it forever. Our content team does this every day to keep clients' websites running smoothly. Try it now with the heaviest 5 MB image on your computer and see the difference.
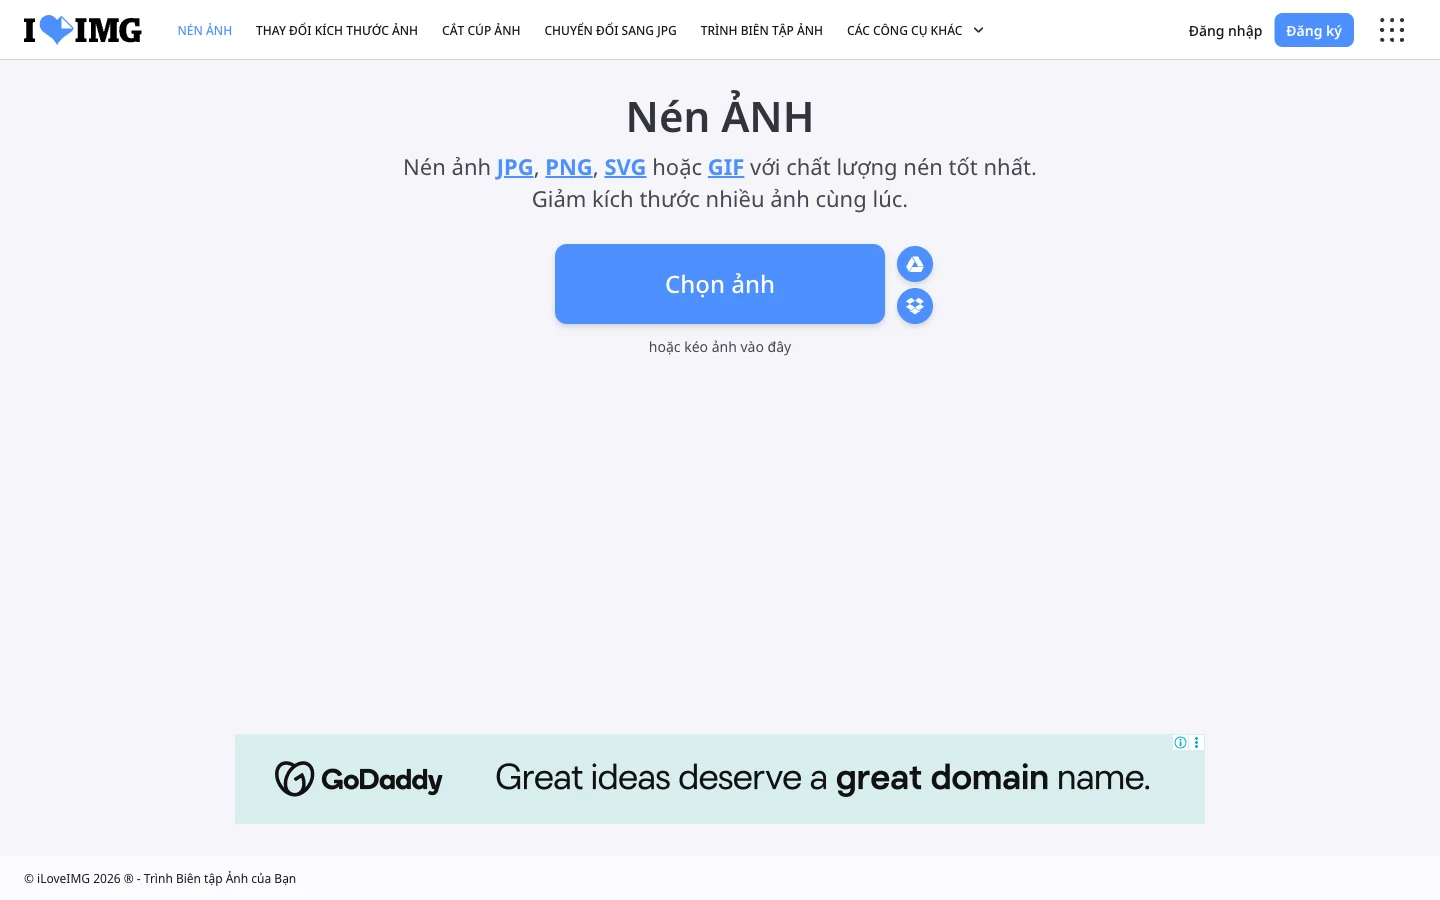
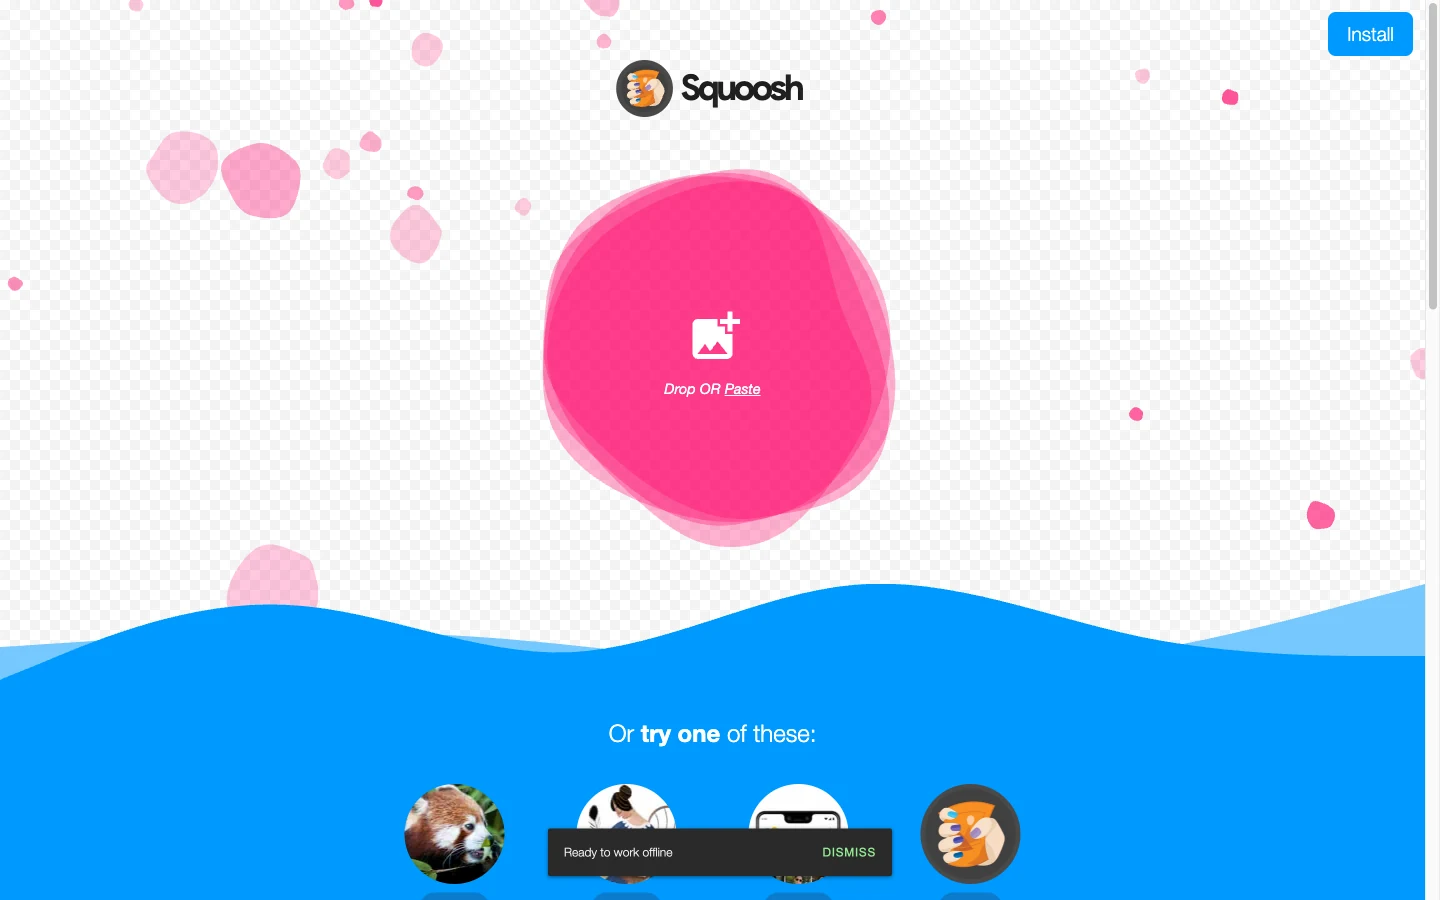
Our tool is very good at detecting the right standard automatically, but we frankly admit there are times you need a more specialized batch tool. Using the right tool for the right job saves a lot of valuable time. Below are four well-known names in the SEO field that we often suggest clients use alongside ours.
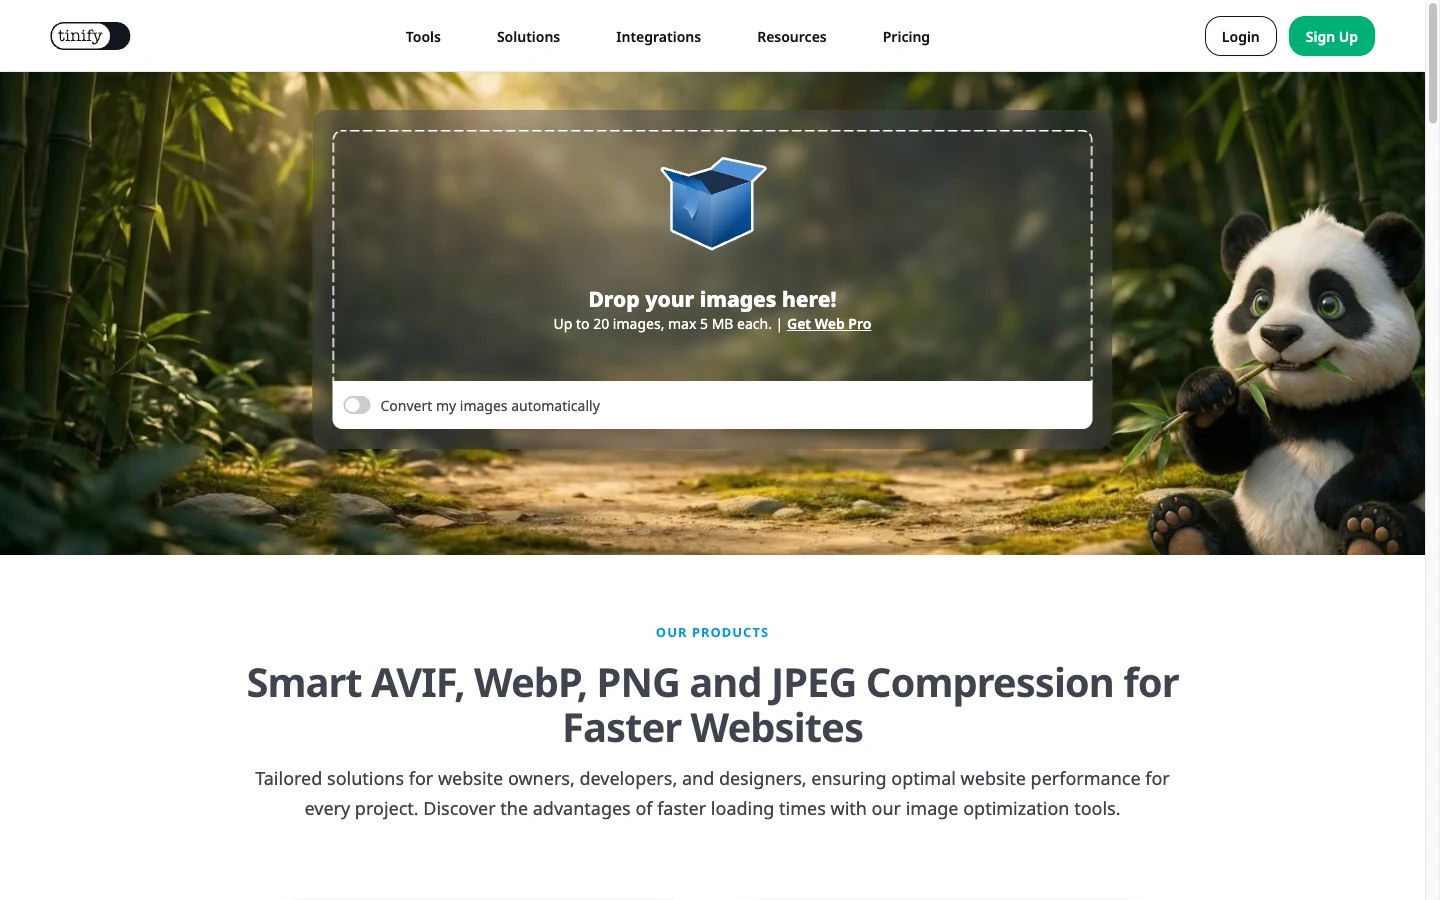
The most popular name is probably TinyPNG, which handles the transparent alpha channel extremely well. The free version only lets you process up to 20 images at a time, with each image no larger than 5 MB (checked 06/09/2026, source: tinypng.com). If the furniture workshop owner above needed to push 1,000 images to an SEO-ready website, using this free version would take a whole day splitting folders. Not worth it.
Squoosh.app, built by Google's own engineers, is a different story. The interface is very intuitive and lets you drag a slider to compare image quality before and after compression in real time. Its biggest drawback is that it processes only one image at a time and has no batch support. The process is very manual. Another option is iLoveIMG, which processes 15 images at once very smoothly and suits content teams with a huge volume of posts.
If your team has a skilled designer, exporting images with the Save for Web function in Photoshop CC 2026 is still the favorite. This tool lets you work deep at the pixel level and adjust detail to exactly 1 percent. Or on a Mac you can use the built-in Preview to resize images right away. Choosing the right tool gets the job done quickly.
If you only have one important image to compress carefully, Squoosh is a strong choice. If you need to convert files, for example image to PDF converter or from PDF to JPG you will need other specialized tools. No software is perfect.
Many content people have a habit of exporting every image as PNG to be safe, thinking it is always the sharpest. That is a common mistake that wastes network bandwidth. MONA's technical team once optimized a news site just by switching all 500 landscape images from PNG to Google's WebP, which cut 500 KB of file size and brought the page weight down to just 30%. Choosing the right format at the start saves most of the storage before you even get to compression.
The oldest and most common format is the 24-bit JPG. It is especially suited to landscape photos, portraits or product shots with millions of smoothly shifting colors. PNG, on the other hand, shines with graphics that have flat color areas, text, or that need a transparent background through the alpha channel. A small mistake leads to a big one: using PNG for real-world photos produces heavy files of up to 10 MB with no better quality.
In recent years, WebP, developed by Google, has emerged as a savior, promising very light files with excellent quality. But not every platform supports it well. The mona.media server currently runs PHP 8.1, yet we still keep WebP turned off for backward compatibility with some social sharing systems. Some older browsers may not be able to read this format. When checking whether a website meets SEO standards, you need to agree on the standard with your technical team from the start.
Forcing users to download images in the wrong format is like making them run in shoes that are too big. The computer has to process bulky data, page loading slows down, and the bounce rate shoots up. Whatever standard you choose, stick with it.
The first story comes from a retail chain selling electronics with many branches. When signing the contract for SEO audit services, we found they had 1,200 unoptimized product images, left exactly as the 4 MB files shot with a professional camera. The total size of this whole library was enormous. The administrator had uploaded these huge images straight to the server, pushing bandwidth into the red zone, and the home page lagged whenever more than 100 visitors were on at the same time.
We immediately wrote a small script that scanned the whole storage folder, resized the longest side to 1000 pixels and recompressed at 80 percent quality. The result was striking. The whole library shrank to less than one tenth of its original size, and page load time dropped from 7 seconds to under the 2.5-second LCP standard. Visitors browse faster. The home page no longer lags when it is busy, and the operations team no longer has to ask for extra bandwidth at every promotion.
Another case was even more awkward, with a landing page running ads for a year-end event. The director put a large advertising budget into it, but the main background image was a 12 MB PNG file. It was hard to believe a file that large. On an office computer with fiber internet it loaded fast, but visitors out on the street on 3G saw only a hopeless blank white area.
The cost of carelessness in preparing images is always paid in real money. These small technical mistakes show up again and again at businesses of every size when there is no a website management AI Agent. Don't let this happen to you.
As you get used to size-reduction tools, a few unexpected problems can easily appear. A new content staff member once complained to us that they had used every compression program, yet after uploading to the home page the speed test still scored a sluggish orange. The cause was clear. They had compressed the image from 5 MB to 1 MB, but kept the width at 4000 pixels. The mobile browser still had to strain to process all that excess pixel data.
The second mistake is even worse: compressing too hard and wrecking the image. To hit 100 KB mechanically, many people drag the quality slider down to 30%. Every detail in the picture turns blurry. On a phone it looks fine, but on a 24-inch monitor the image is smeared and full of jagged blocks. Content like this is worse than posting no image.
Another fatal mistake is not keeping the original 4K files. We have seen a marketing team run its whole event image folder through TinyPNG and overwrite the old files. The consequences for the campaign were serious. The following week the boss asked for a large banner to be printed, and the team panicked because the whole library only had 800-pixel images left. When you compress images, leave yourself a way back and always keep the originals.
Tools are only a support; the way you work decides the final quality. If you are still unsure, use website knowledge in a structured way to understand the basics instead of risky trial and error. Fixing mistakes always takes longer than doing it right the first time.
In the course of delivering optimization projects for SEO services, we have received hundreds of questions about media file size. According to an Ahrefs report updated on 06/09/2026, the keyword “giảm dung lượng ảnh” (reduce image size) draws 17,000 searches, “nén ảnh” (compress images) reaches 9,000, and “nén hình ảnh” (compress images) also reaches 1,600 per month. Demand for website optimization is very large. Below are the most common questions business owners ask when they start doing this.
The first question we usually get is how to tell whether an image on a website is too heavy. The easiest way is to right-click the image in Chrome, choose save to computer and look at the file size. It is very easy to check. If it is over 200 KB for an image inserted in a post, you should look at it again right away. A page with too many images like that is a heavy burden for the server.
Many people also wonder whether any tool can do this automatically across the whole system. Popular CMS platforms have many plugins that automatically shrink each image as it is uploaded. But before you do it, we have a warning. We advise using a high-quality paid plugin to keep processing stable and avoid server crashes midway.
Finally, should you strip the hidden metadata from image files to reduce size? Removing EXIF camera data saves another 15 KB or so, but be careful to keep the copyright fields so search engines can recognize them. Losing image copyright means losing your business's credibility.
Making a website fast is a long fight that takes both foundational knowledge and care in every small detail. Reviewing and reducing image size online is the first step, the easiest, and the one with the clearest results, and it costs nothing. It is very easy. Once 100 percent of your media is handled, you have cleared most of the load from your system and brought server response time down to an ideal level.
To really grow revenue, put yourself in the position of hundreds of customers clicking on a product while the page just keeps spinning. We know you spend tens of millions of VND every month buying traffic and putting up banners everywhere, only for the system to politely turn customers away because of a few dozen megabytes of uncompressed images. And even so, hand-compressing a few images is a drop in the ocean; visitors will still leave if the core of the website is not fixed at the root.
Since 2016, MONA has directly delivered more than 14,000 projects across every field. An 85% returning-client rate is the number we have kept all these years. An in-depth SEO audit will uncover every technical bottleneck. If you have tried using image size reduction tools yourself and compressed every image, yet the home page is still slow, you need a truly reputable partner.
Customers will never wait for a 5 MB image to finish loading before deciding to buy. Don't let your marketing budget slip through your fingers for nothing. Call the hotline 1900 636 648 or see our website optimization service so our specialists can diagnose and fix the slow website for good. Contact our team today.

CEO & Founder · The MONA
Founder of The MONA, who built a services company of 60+ staff with 14,000+ projects delivered. Khánh Hùng shares how he thinks about building systems that run themselves, automating a business, and the real lessons from delivering projects at MONA.
 1,5K




Professional website
design services
Own a website with a beautiful, 100% exclusive design and a lifetime warranty, with the ability
to expand features flexibly as your business grows, starting today!






 MONA will never sell your information or send you spam


 MONA will never sell your information or send you spam
