
 MONA OS 2.0
 Partner with MONA


 Tự động hoá doanh nghiệp
 Cẩm nang SEO
 Digital Marketing
 Kinh nghiệm thiết kế website
 Hạ Tầng Server
 Giáo dục


 VI
 EN









Message us on
Zalo Official


 ProductsNew

 ProductsProducts
 Mới ra mắtKHA AI 2027App tự edit video, tự đăng mọi mạng xã hội, 2 phút mỗi ngày







 Website designLooks good and wins customers over.
SEO servicesBrings in customers searching for exactly what you sell.
 Tư vấn digital marketingKéo khách từ nhiều kênh, đo bằng số thật.
Corporate video productionVideos introducing your company, factory and team.
 NewAI video productionCompany story films made with AI.
 Custom software developmentCRM, ERP and HRM built for your business.
 Viết AI Agent theo yêu cầuĐặt riêng một trợ lý AI cho đúng việc của mình.
 Tư vấn chuyển đổi AIĐưa AI vào vận hành của cả công ty.
NewMONA LMSManagement for centers and schools.
MONA SkillHubInternal training for company staff.
 NHTQ systemEnd-to-end China–Vietnam shipping operations.
MONA JMSManagement for gold, diamond and pawn shops.
 MONA E-LearningA website with every feature you need to sell courses.
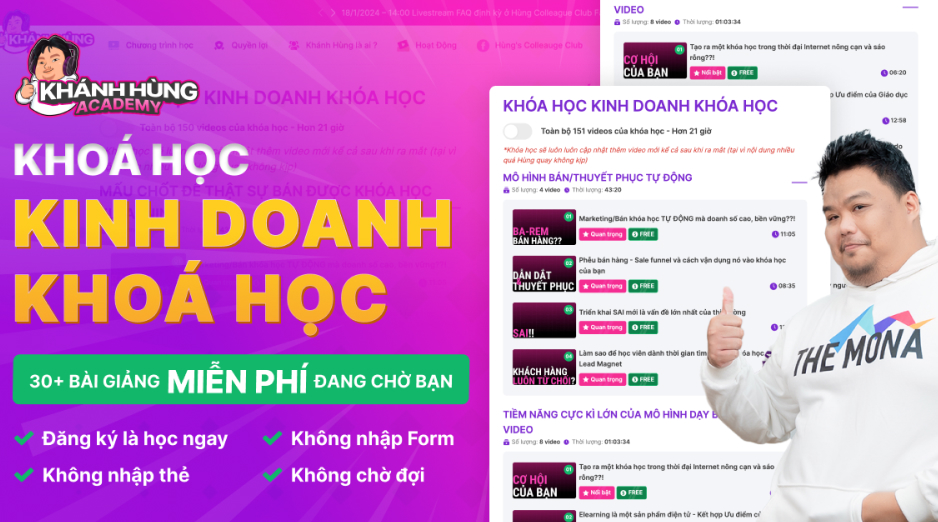 How to sell online courses (course)More than 30 free lessons on selling courses on autopilot.
 MONA Cloudmonacloud.vnServers to get your apps and websites running.
 MONA Basemonabase.vnPostgres database, sign-in and file storage.
 MONA Mailmonamail.vnSend OTP, order and invoice emails from your software.
 MONA Paymonapay.vnAccept bank transfers via VietQR and notify your software when the money arrives.
 MONA eInvoiceComing soonIssue e-invoices that meet tax standards.
Gấu CườiTrả lời khách 24/7 trên web, Fanpage, Zalo và thu lead cho sale.
 Gấu TeleSalesGọi điện tư vấn, chăm khách như tổng đài viên thật.
Dê CườiTư vấn và chốt đơn cho shop ngay trong khung chat.
Gấu WebmasterNhắn nhóm Zalo là website được sửa xong.
 Gấu Pháp ChếSoạn hợp đồng, rà điều khoản trong vài phút.
 Gấu Báo GiáLên báo giá đúng mẫu và gửi khách ngay.
 AI chăm sóc khách hàngTheo dõi và giữ chân khách hàng cũ.
 Gấu Tuyển DụngLọc hồ sơ, hẹn lịch, phỏng vấn ứng viên.
 Mới ra mắt
KHA AI 2027
Xây kênh chuyên gia 2 phút mỗi ngày
Quay bằng điện thoại, AI tự edit video, tự đăng lên 16 nền tảng và tự trả lời bình luận, tin nhắn.
932.285lượt xem trên kênh CEO MONA sau 42 ngày
 Anh Khánh HùngCEO MONA đang dùng mỗi ngày
Xem app làm được gì
 AI
Gấu Cười MONA ĐANG TỰ XÀITrả lời khách 24/7 trên website, Zalo OA, Messenger và thu lead về cho sale.
Dê CườiChốt đơn bán lẻ và sàn: Shopee, TikTok Shop, web. Chăm cả khách sỉ, đại lý.
Gấu WebmasterCập nhật nội dung, tối ưu SEO website mỗi ngày.
Gấu TeleSalesGọi điện tư vấn, chăm khách như tổng đài viên thật.
Gấu Tuyển DụngLọc hồ sơ, hẹn lịch, phỏng vấn ứng viên tự động.
AI chăm sóc khách hàngGiữ khách cũ, cứu lead đã rớt cho phòng kinh doanh.
Gấu Pháp ChếSoạn hợp đồng, rà điều khoản trong vài phút.
Gấu Báo GiáLên báo giá đúng mẫu, gửi khách ngay khi có yêu cầu.
 Chuyển đổi AI toàn phầnGiải pháp tổng cho doanh nghiệp, 3 lớp triển khai.
 Viết AI Agent theo yêu cầuĐặt riêng một con AI gánh đúng nghiệp vụ của bạn.
 Custom softwareCRM, ERP and HRM with built-in AI automation.
 SEO & AEO thời đại AIĐược Google lẫn AI trích dẫn, không chỉ xếp hạng.
 Kiến thức AI cho doanh nghiệpBài phân tích, hướng dẫn ứng dụng AI vào vận hành.
 Free AI courses
 AI tools at work
App mới · KHA AI 2027
Xây kênh 2 phút mỗi ngày
AI tự edit video, tự đăng mọi mạng xã hội
Free consultation, 8am–10pm every day

15 June, 2026
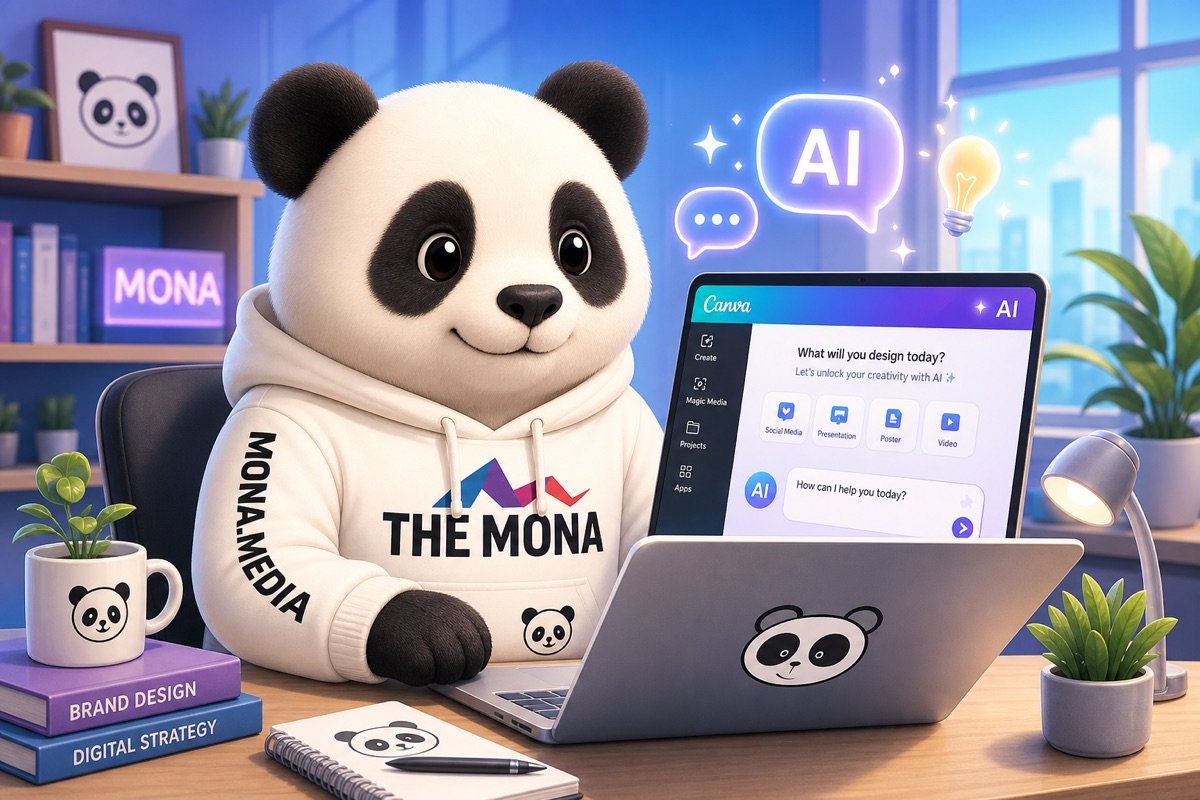
Canva AI on your phone is a fast way to create posts, product images, short videos, and presentations when you're away from your computer. This article goes straight to the steps: download the Canva app, log in, open Magic Studio, use Magic Design, Magic Write, and Text to Image, and export files at the right size for Facebook, Zalo, and your website. MONA writes from real marketing and sales experience, with notes so your internal team uses it consistently. A standalone tool handles personal tasks quickly, but automating data, CRM, website, and SEO still needs a dedicated system.
This section takes you straight to the steps. No detours.
Canva AI on your phone is enough to create images, edit photos, write text, remove backgrounds, and resize for everyday marketing content.
At MONA, we use Canva AI to quickly sketch visual ideas, then move them into web design, SEO and full marketing campaigns.
Open the App Store on iPhone or Google Play on Android. Type the exact name “Canva: Design, Photo & Video”.
Check that the developer is Canva Pty Ltd. This helps you avoid downloading a fake app.
Do it right from the start.
After installing, open Canva and allow photo access when you need to edit product images. You don't need to grant location access.
Photo access is enough.
Log in with your company email, not a staff member's personal account. Sales designs are marketing assets.
When a staff member leaves, a personal account can easily lose files, templates, and edit history. It's a small thing but causes real mess.
MONA usually advises clients to gather design assets under a business email. This helps the marketing team manage things better.
Here's a small tip that's well worth doing. Name files with this formula: date, channel, product, version.
For example: 2026-05-facebook-serum-a1. Just by looking at the name, you know where it's used.
In Canva on your phone, tap the search bar or the create design button. Then look for the Magic Studio group of features.
This is where many of Canva's AI tools live. You don't need to remember all the names right away.
Remembering 4 groups is enough.
For sales images, start with a sharp product photo. Canva AI works better when the original photo is bright enough.
A bad photo is still a bad photo. AI only helps fix it faster.
We usually use Canva AI to produce an internal draft first. The final published version still needs a review of layout, text, colors, and brand identity.
After opening the right Canva AI area, create folders before you start working in bulk. This helps your marketing team avoid mixing up files.
Don't keep everything in one place. It gets messy fast.
This split is simple but saves a lot of time looking for files. New staff also get up to speed faster.
MONA uses a similar approach when training clients to use AI tools for marketing. A tool should serve the process, not add confusion for the team.
Canva AI on your phone handles one-off tasks quickly. But when you need seamless data, clear permissions, and automation across CRM, ERP or your website, a business needs custom software built by MONA.
AI images in Canva can easily come out overly glossy, off for your industry, or like generic stock illustrations. If you enter a vague request, Magic Media guesses based on the machine's own taste.
We usually fix this with a 4-layer prompt formula: image role, product, setting, and style. This makes images more usable for ads, articles, service illustrations, and campaign backgrounds.
Don't write too short. The clearer the prompt, the less editing you do.
The first layer tells Canva what the image is for. Ad images, article covers, service intro images, and campaign backgrounds each need a different layout.
Start your prompt with the image's specific role. MONA usually writes things like: “Create an ad image for the campaign…” or “Create an illustration for an article about…”.
Do this first. Magic Media will stop guessing the goal of the image.
Layer 2 keeps the image tied to the business context. You need to say what the product is, who uses it, and in what situation.
A weak prompt often says only “luxury spa image” or “image of online course”. The results tend to be cheesy, repetitive, and hard to use on a website or in ads.
A better prompt reads: “A woman aged 30 to 40 getting advice on a skincare treatment at the reception desk of a modern spa”. That gives the AI enough material to build a more accurate scene.
Details make the difference. But the details must fit the job.
Layer 3 keeps the image from drifting off your brand voice. Lock in 3 groups: main colors, lighting, and layout.
Canva AI easily makes images too vivid, too glossy, or too much like a template poster. With rules for color and layout, images come out closer to your brand assets.
MONA usually adds the line “leave 30% empty space on the left for the headline”. That number makes the image easier to drop into a banner.
No need to be flashy. Just match your brand identity.
The last layer blocks common AI image errors. Magic Media can produce warped text, extra hands, strange faces, or cluttered backgrounds if the prompt is too open.
Add a “no” section at the end of your prompt. It's a small layer, but it saves many regenerations.
Don't skip this layer. Clean images are easier to use on your website, in ads, and in posts.
You can use the 3 templates below right away in Magic Media. We wrote them in the 4-layer structure so it's easy to swap the industry, product, and style.
When working internally, MONA usually saves prompt templates by task group. The design, SEO, and content teams can reuse them, then adjust for the specific campaign.
Canva AI quickly handles one-off visuals. But when a business needs seamless data, clear approvals, and marketing automation, standalone tools hit a ceiling.
At that point, MONA usually advises custom software, a website, SEO, and an operations system with connected data. AI is only the means; revenue is the real goal.

A very common mistake when making images in Canva AI is to create a square image first, then force it into a vertical frame. The result is often cut-off faces, a misaligned headline, and a product missing its key part.
A safer way is to build the 9:16 version first. Then duplicate the design and switch to 1:1 and 16:9 for each channel.
Less rework from scratch. Less lost layout.
For Reels, Zalo stories, Facebook stories, and TikTok, start with a 9:16 frame. It's a vertical frame that fits phone screens.
In Canva on your phone, create a new design and choose the story or vertical video size. Only then use Canva AI to create the background image, product image, or layout.
MONA usually has internal marketing teams build the vertical version before adapting it to other channels. This lets one idea be reused many more times.
The safe zone is the middle of the frame, where content is least covered by buttons, avatars, captions, or navigation bars. Treat this area as the vault of the image.
Faces, the main product, prices, and headlines should sit in the middle zone. Decorative details can sit closer to the edges.
It's easy to get wrong. It may look fine on a big screen, but on a phone it feels cramped and hard to read.
Once you have the 9:16 version, don't edit the original directly. Duplicate the design first, then change the size to 1:1.
In Canva, you can use the resize feature if your account supports it. If not, create a new square design and copy the main elements over.
The 1:1 version should have less text than the vertical one. Facebook usually displays square images well in the feed, but small text still hurts readability.
When you need to reuse the image for a website banner or sales slides, create a 16:9 version too. It's a horizontal format, so the layout needs more room to breathe.
Don't just stretch a vertical image sideways. That easily distorts faces, shifts the product, and breaks the background layout.
For website banners, leave room for a call-to-action button. The text needs to be large enough to read clearly on both computers and phones.
MONA usually separates social images from website images when rolling out content. A website needs a cleaner layout because images also affect the shopping experience.
Before downloading the image, shrink the design to roughly the size it will appear on a phone. It's a small step that rescues many errors.
Text that looks good in Canva isn't always easy to read once posted. This is especially true for thin text, text with lots of effects, and text on a mixed light and dark background.
Slow down by one step. Fewer rounds of edits.
Canva AI is very handy for quickly creating individual images. But when a business needs a seamless process across design, website, SEO, CRM, and reporting, standalone tools hit a ceiling.
At that point, MONA usually advises custom software, a sales website, and a marketing system with connected data. We still use AI internally and train clients on it, but a lasting operation needs to be designed as a system.

Product photos often fail because of a cluttered background, a frame that's too tight, or one detail in the wrong color. These three small flaws are enough to make a post look unpolished.
We usually show marketing teams how to fix them quickly with Canva AI before putting images on the web, social media, or sales pages. The goal is to rescue the image enough to be clean, not to turn it into a fake.
Background Remover works well for photos taken in a store, warehouse, desk, or display counter. The more extra items in the background, the more the product loses impact in a post.
MONA usually uses this step for landing page illustrations, social posts, and draft banners. A clean background helps the design team get to a layout faster.
Product photos taken too close are hard to add text, logos, or call-to-action buttons to. On a banner, the image feels stuffed and has no empty space.
Use Magic Expand for photos that need to go on many platforms. One original photo can become a square, a vertical, and a horizontal version without reshooting.
Magic Edit is useful when a small detail throws off the message. For example, a glass in the wrong color, a very dirty tabletop, or an accessory that doesn't suit the campaign.
The more specific the prompt, the better Canva understands. Describe the color, material, setting, and approximate size of the object.
AI images usually give themselves away in shadows, light direction, and product edges. Viewers may not say it out loud, but a feeling that something isn't real lowers trust.
In MONA's marketing workflow, AI-edited images always get a human look-over. AI is fast, but the feeling of realness still needs someone with taste to check.
Canva AI helps fix photos fast, but one wrong move can lose important details. The original is the safety layer for the whole team when something needs redoing.
Since 2016, MONA has worked on web, SEO, and software for over 14,000+ projects. We see marketing teams work faster when original files, edited files, and image standards are clearly stored.
Canva AI is very handy for one-off tasks on your phone. But when a business needs images, product data, web, SEO, and content approval to run seamlessly, custom software is still a more lasting foundation.
A sales design reused too many times makes content look stale very quickly. Customers feel they've seen it before, and the marketing team runs out of ideas.
The right way is to keep the brand frame and change the parts that create a fresh feel. Keep it simple first.
With Canva AI on your phone, you can create 5 versions from one original template. We usually use this when preparing images for Facebook, Zalo, websites, and SEO articles.
Before you tap duplicate, fix the parts that must not change. Logo, main color, and typeface are the 3 layers that keep your identity.
In Canva, open the original design, select the logo, and place it in the right spot. Then keep the call-to-action button color on brand.
Don't change everything. It looks messy.
If the brand already has a website, take colors from its main interface. MONA usually syncs ad image colors with the sales page when building website design.
Once the identity is locked, duplicate the design into 5 versions. Each version should serve a specific customer group.
This is the step many teams get wrong. They change the colors to look nicer, but they don't change the sales angle.
These 5 versions still come from the same original template. But each image speaks to a different need.
A sales message needs to be repeated in a controlled way. You should only change how it looks, not the main promise.
For example, say the original message is "book in 30 seconds". All 5 versions still revolve around fast booking, and don't drift into discounts or gifts.
The message stays fixed. The visuals rotate.
This way the image looks fresh without breaking the brand's thread. The sales content also leads back to the same landing page more easily.
Headlines on a phone image must be short. If the text is long, even a beautiful Canva design is hard to read in the feed.
You can use Magic Write to shorten headlines. Enter the original sentence, then ask it to rewrite it shorter in a clear sales voice.
Be specific with your prompt. Don't be vague.
After Magic Write returns a result, don't use it word for word right away. Reread it in your brand voice, then edit it so it sounds natural.
Images that are finished but named carelessly are very hard to manage. Marketing teams easily post the wrong version, especially when there are many channels.
MONA usually recommends naming files in 3 parts: the posting channel, the posting date and the content goal.
The structure is very simple.
When doing SEO, clear file names also help the content team manage images better. Images should look good and also serve the content structure.
Canva AI helps you make one-off visuals fast. But as volume grows, manual work hits a ceiling.
At that point, a business needs its own system to connect product data, content, website, CRM and reports. MONA can build custom software so the marketing process runs more smoothly.

A Canva image looks great on a phone but loads heavy on the web and looks blurry on Facebook. The mistake is usually in the export step, not in the design.
We usually guide MONA's customers to choose the format based on where it will be posted. The same design should be exported differently for web, social media and sales documents.
PNG suits images with text, logos, icons, short price lists, or images that need a transparent background. This format keeps text edges cleaner than JPG.
Use PNG for logos, call-to-action buttons and images with a lot of small text. For large product photos, PNG usually makes the file heavier than necessary.
JPG suits article illustrations, product photos, team photos and background images. The file is usually lighter than PNG when the image has a lot of color.
For SEO articles, we usually prefer JPG for illustrations inside the content. The website loads lighter, and readers wait less when scrolling.
If an image has small text, export both PNG and JPG to test. Use whichever file is lighter while the text stays clear.
PDF suits documents that need a fixed layout. Quotes, company profiles, menus, short catalogs and print documents should use PDF.
Standard PDF is lighter and good enough for Zalo, email and Messenger. PDF Print is heavier but keeps good quality for printing.
MONA usually keeps the two versions separate when making documents for customers. One for sending online, one for print, so nobody sends a file that is too heavy by mistake.
Heavy images make pages load slowly, especially when an article has many pictures. When readers leave early, the effort put into the content is wasted.
For example, a blog image doesn't need to be 3000 px wide if the display frame is only about 1200 px. If you reduce the size before downloading, it will be clearly lighter.
For websites built at MONA, we usually combine the right image format, compression and a suitable display structure. This is directly tied to website design and page load speed.
Exported images scattered across a phone are very hard to manage. Marketing teams easily post an old version by mistake or waste time asking for the file again.
Clear naming helps the SEO, ads and sales teams get the right file faster. MONA also applies this habit when training customers to use Canva AI at work.
Canva AI handles one-off design quickly, but it still has a ceiling when data is scattered. Businesses that want images, content, website and SEO to run smoothly need their own system.
When you need to go further, MONA usually combines SEO, a website and custom software to cut manual work. Canva supports fast production, while the system helps measure and steadily optimize the marketing cash flow.
Canva AI on a phone is very handy for quick images, urgent posts and content that has to go out today. But a standalone tool still has a ceiling when a business needs data, permissions and a clear approval process.
That is the ceiling. You should still use Canva AI for personal work and for the marketing team. We just shouldn't mistake it for a system that runs sales operations.
When one person makes images, Canva AI runs very lightly. When many people work together, the problems start to sit in edit rights, approved versions and the data behind the content.
One post may pass through design, copywriting, brand management and a budget approver. If everything lives in scattered messages, the marketing team can easily use the wrong image, the wrong price or the wrong message.
This point is very important. Canva AI helps make images fast, but it can't replace the content governance process of a whole business.
Canva AI belongs in fast creative work. Use it for illustrations, social banners, trial product images and content variations by campaign.
This part should be kept separate. The system must handle the jobs that need connected data, access permissions, approval status and automatic pushing of information to sales channels.
MONA usually guides internal teams and customers to use AI tools for the right jobs. For jobs that need custom software, we separate them out so a standalone tool isn't stretched too far.
A beautiful image is only the first touchpoint. Revenue arrives when content connects to website, SEO and the CRM.
If data is scattered, the marketing team sees a post with engagement but doesn't know which customers landed on the page. The sales team also can't tell which content a customer came from.
We need a clear link. Canva AI creates the raw material fast, and the system sends that material down the right sales path.
MONA doesn't see Canva AI as something to replace. We see it as a good tool for one small segment of the content process.
When a business needs connected data, permissions, content approval and automation, MONA builds custom software. The usual approach is a CRM, an ERP, or an automation chain that connects marketing with operations.
MONA started in 2016 and now has .000+ projects. The rate of customers who keep working with us is 85%, based on MONA's internal data.
To sum it up: Canva AI on a phone is great for making content quickly. Businesses that want real automation need custom software, connected data and a process designed properly from the start.

CEO & Founder · The MONA
Founder of The MONA, who built a services company of 60+ staff with 14,000+ projects delivered. Khánh Hùng shares how he thinks about building systems that run themselves, automating a business, and the real lessons from delivering projects at MONA.
 408



Professional website
design services
Own a website with a beautiful, 100% exclusive design and a lifetime warranty, with the ability
to expand features flexibly as your business grows, starting today!





 MONA will never sell your information or send you spam


 MONA will never sell your information or send you spam
